Team
Collaborate with your team in real time.
1.Collaboration mode
Collaboration mode is Verbum Nexus's shared workspace. This mode is available only on the Studio plan. See Plans & Billing.
If you still have another active plan, you will not be able to access this module, so you will see the prompt to upgrade.
2.What happens when you upgrade to the Studio plan
When you upgrade from an individual plan to Studio, your main workspace becomes a team workspace and all ceremonies and related content become part of that same plan. At the same time, the platform automatically creates a new Free personal workspace so you can continue to have a private place where you can work alone on your personal ceremonies.
This means that after the upgrade, you end up with two different workspaces:
- the Studio team workspace, for collaborative work;
- the new personal workspace, for private work.
Each workspace keeps its own subscription, credits, storage, and ceremonies. What is in the team workspace does not mix with what is in the personal workspace.
If you later upgrade that new personal workspace, the same process happens again: that workspace becomes a team workspace and another new Free personal workspace is created.
3.How to upgrade
- Go to Settings → Plans & Billing.
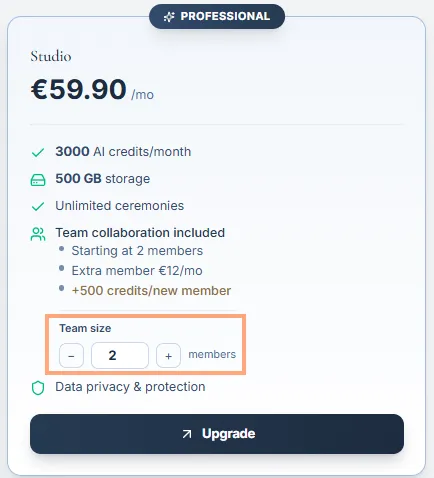
- On the Studio card, choose the number of members on your team in the seat selector.
- Confirm the upgrade and complete the payment.
4.What is included in the Studio plan
The Studio plan includes 2 members by default. If you need more seats, each extra member adds:
- €12/month
- +500 credits/month in that workspace
5.Invite members
- Go to Settings → Team.
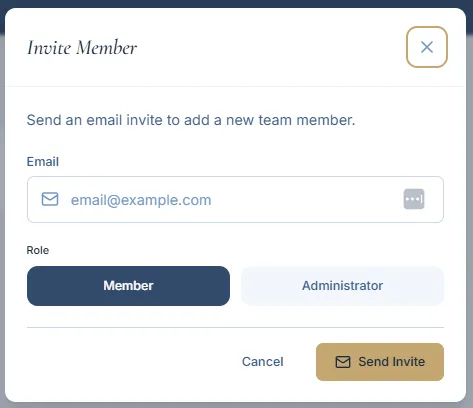
- Click Invite.
- Enter the email and choose that person's role, admin or member.
- Send the invite.
- The invited user will receive the invitation highlighted on the main platform page and can accept or decline it.
Notes:
- You can only send the invitation if that person already has an account on the platform. If they do not, the invite cannot be sent.
- When accepting the invite, the invited person can choose what to do with their information and ceremonies: transfer them to the new team workspace or keep them in the personal workspace.
- The transfer is only possible if the team workspace has enough storage to receive that content.
- If there is not enough space, the invited person will be asked to manage storage before continuing with that operation.
- If you have already used all available seats on the team, you first need to go back to Settings → Plans & Billing and increase the number of members.
6.Roles and management
There are two distinct roles inside a team:
- Admin — adds, changes, and removes members and manages billing, credits, and the workspace, including the option to delete it;
- Member — participates only in ceremony preparation and editing.
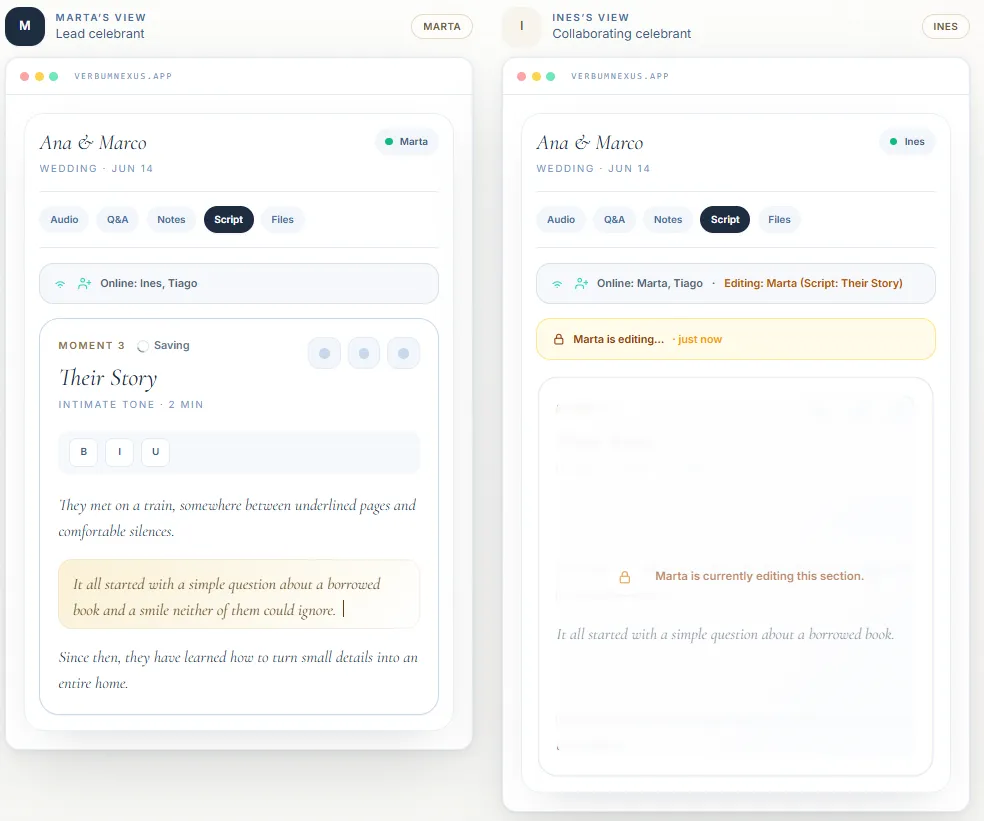
7.Real-time presence
When you are editing ceremony sections, you can see who is working on what at that moment. This helps you avoid overlap and coordinate the work better with your team.